vendredi 18 septembre 2015

Dinosaur... ROAR !

Back in June I made a cake for a friend's son's birthday ! The little guy loves dinosaurs so much that his super Mam had this awesome Dinosaur themed party all set up for him and his friends.
I love baking cakes, and it's the second year I have the privilege to bake his birthday cake.

I'm going to share my now favorite Chocolate Cake recipe. Spoiler alert - it is to die for! It's moist (love this word), moist, moist and very moist (and delicious) ! The cake is tasty but without being too heavy. I am now using this recipe for every chocolate based cake I need.

Because it's Friday (TG) and feel generous before the weekend, we are going to top it up with a decadent Chocolate Buttercream frosting.

Let's all welcome and give a round of applause for Calories, my dear friends.

                                       ___________________________________________________________


For the skeleton, it's quite simple in fact. All you will need is Google Image, a printer, some grease proof paper, white chocolate or assimilate and piping bag/piping bottle.
To make sure that your dinosaur doesn't break, I would suggest to go over the drawing several times. It will create a thick and resistant decoration for your cake and it will allow you to move it easily from the grease proof paper to the cake.
 
Bake your Chocolate Cake (double the recipe if you want two layers, like me), and let the cakes cool completely down.
Prepare your Chocolate Buttercream frosting, and let it set in the fridge for 15-30 mins if you find it too liquid-y.

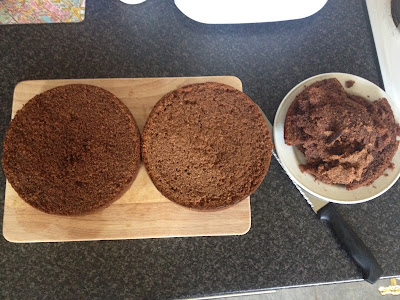
Once the cakes are cold, cut the excess to make them even. With the leftover you can make cake pops for example - you're welcome !
Spread a thick layer of buttercream on top of the first cake, and place the second cake over it. Make sure that they are straight, and smooth out the extra frosting that may try to escape.
They are now as one.

You will have to carve a hole in the top of the cake, to create that "excavation" look.


Cover the whole cake with a thin layer of frosting and make sure to have it real smooth. Be careful to not put crumbs in the container of frosting, you may need to wipe your spatula several times in between two spreading. Pop the cake in the fridge for half an hour.
Once the frosting is set, finish it up ! Go crazy and spread the remaining frosting all over the cake - smooth or rough finish, that's up to you. It's supposed to be mud, so I kept it rough enough.
I put frosting on the edges of the excavation cavity as well, and then I crumbled some digestives biscuits to fake the dust. 

Gently place the skeleton in the hole, add more "dust" and pop the whole thing in the fridge until delivery.


The final result:


Extras: Dinosaur footprints Sugar Cookies and Dinosaur Eggs cake pops (without the stick - too dangerous with children running around at a birthday party!). Just add some cream cheese to your cake leftovers and shape some ovals. Dip them in the white chocolate you used for the skeleton and Voilà !


I hope you'll like it as much as he did. 

love

Ben


vendredi 11 septembre 2015

Transformer un livre en boîte !

Aujourd'hui une petite réalisation tout en poésie. Je vais vous illustrer comment faire une boîte dans un livre.
La technique n'est pas compliquée, le tout est  d'avoir un peu de patience et de ne pas avoir peur de sacrifier un livre. Pour les amoureux des livres il faut prendre sur soi et choisir un livre qui ne vous tient pas à cœur !

Pour la petite anecdote, Bénédicte a réalisé ce même bricolage il y a quelques mois, bien avant le blog. En fin d'article, vous pourrez retrouver sa très très jolie réalisation !


Sans plus attendre, le détail en images. 

Dans un premier temps, choisissez un livre avec une couverture rigide. Il faut que le livre soit assez épais de manière à ce que votre boîte ait de la profondeur. Pour l'aspect général de votre réalisation, il est préférable de choisir un livre avec une jolie couverture. Pour ma part, c'est un livre bleu, assez simple, avec des liserés dorés. J'ai choisi ce livre car le titre, La passion des femmes, collait avec le rendu final de mon ouvrage : la boîte à bijoux ! 
Ma sœur a hurlé au scandale par ce que Sébastien Japrisot est l'auteur d'Un long dimanche de fiançailles... Oups ! 


L'essentiel du travail va être de découper une à une les pages de votre livre afin de créer un creux. Vous pouvez laisser une ou deux pages au début, pour garder l'illusion du livre. Pour la suite, munissez-vous d'un cutter et d'une règle et découpez vos pages. Pour ne pas fragiliser vos pages, gardez une marge ni trop grande, ni trop petite. Il faut trouver le juste milieu pour qu'à la fin la boîte ait une contenance correcte sans fragiliser le tout. 
Toujours pour garder l'illusion du livre, conservez quelques pages en fin de livre. Une fois l'ensemble de vos pages découpées, vous avez fait le principal ! 


L'étape de consolidation réside dans le collage des pages. Pour ce faire, munissez-vous de colle à papier peint ou autre colle type cléopatra  et badigeonner vos pages pour les coller entre elles ! Laissez sécher et le tour est joué ! Attention tout de même à ne pas coller les pages du début que vous n'avez pas découpée !


En finition vous pouvez ajouter un fermoir à votre boîte. Bénédicte a opté pour un fermoir classique que l'on trouve dans tous les magasin de loisirs et création. J'ai préféré fermer ma boite avec un ruban rose. Pour ce faire, j'ai collé avec de la super glu les deux bouts de rubans dans le couverture. Peut-être que j'aurais dû laisser plus de longueur pour faire le nœud.. pas grave, je peux quand même faire un petit nœud ! 


Voilà le tour est joué ! Votre boîte est terminée. Vide poche ou boîte à bijoux elle s'adapte à toutes les situations. Une fois le couvercle refermé l'illusion est conservé, c'est un livre et non une boîte que vous avez ! 


 Oups les finitions qui ne sont pas finies... Un coup de papier de verre pour peaufiner le fini des pages découpées n'est pas de trop !


La version de Bénédicte : 


vendredi 4 septembre 2015

Watercolor Sugar Cookies

Baking is a form of art, but being able to merge baking and painting together was good fun !
My painting-drawing skills are quite limited, but I just went with the flow. Also, keep in mind that it was my first go. I will definitely make them again !

You will need your best sugar cookie recipe (find mine here), some white fondant, food coloring and clear vanilla extract/almond extract.
I personnally chose to go with the vanilla and I also tried directly with the food coloring, which, worked out fine.
Roll out the fondant to the desired thickness

Use the same cutter as for your cookies


With a mixture of water and icing sugar, stick together the fondant and the cookie.


Once you have finished every cookie, let them rest for few minutes. In the meantime, you can prepare your "paint".

In small containers, mix the extract with one color. Repeat this step for every color you wish to use.


Let your imagination running and enjoy the painting !

Again, I would like to emphazise the fact that my imagination isn't wild enough


 Ben x